Abby's Art Club

A DIY blog about starting an art club for kids and finding the inspiration to keep it going.

Monday, September 10, 2007

Charlie


Charlie Garland Shotwell

born July 17th, 2007


I forgot how tired you can get with a new baby. Last spring I was sure that we would start art club up in the fall like normal, but I realized shortly after Charlie was born that we would need some time. The start of art club is postponed until further notice. Charlie and I need to get a bit more rest and then hopefully I can resume hosting the young art enthusiasts.


Peace.

Monday, June 11, 2007

summer school


Art Club is on hiatus for the summer. The kids should be keeping up with their sketching and crocheting, and we'll pick up with our chair theme again in the fall. I asked the art club students to find an old chair this summer, either at a garage sale or in their basements, to transform next year into a "super chair" -- one that in functional and empowered with special qualities. It will be interesting to see what they come up with.

Last summer I had several optional art club meetings during vacation, but attendance was sporadic with all the different family schedules. This summer I simply asked students to keep in touch and plan on a show and share session when we regroup. Many of the art club kids attend camps and other art classes in the summer where they pick up new crafts and techniques to share with the group.

Sometimes I offer summer mini camps (last year we did several weeks of miniatures), but this summer I will be quite busy with a new baby due in July. I hope to have some updates for the blog this summer (maybe we will hear how Sylvia's new hat business is going or get a chance to visit Carina's fairy forts?) but the entries will be less frequent.

Keep it up art club! Have a great break.

Monday, June 04, 2007

chair painting


We spent some time thinking about chairs this week at art club. Chairs are a pretty great subject. I have quite an assorted variety around my house. I started by asking the kids to sketch ten different chairs from life. I asked them to think about what type of chairs seem happy and what type of chairs seem fat. We discussed scary chairs and solid chairs. Skinny chairs and silly chairs. Adult chairs and those meant for play and children. Are some chairs more restful than others? We naturally had some philosophical questions about chairs. What type of chair would we choose to represent us in a chair self portrait? What type of chair would we pick to live with if we could choose only one chair? What words do we think of when we think of chairs?


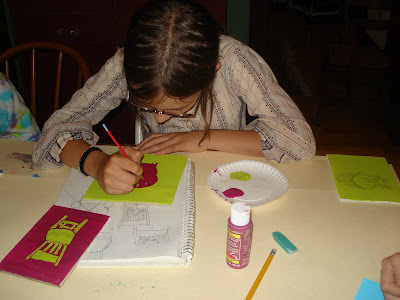
After much musing and sketching, we got to work painting little chair vignettes on masonite board. The art club was asked to translate their sketches to paintings using simple lines and a minimal palette.


Some of the students worked with bold outlines to really make their chair designs pop. Check out how excellent chair drawing is for learning perspective!


Monday, May 21, 2007

crochet


Leaf shows off the crochet purse she made in class. Her t-shirt reads "Perfect at Being Bad". I thought that this was a funny statement about Leaf's whole crochet experience. She definitely struggled to keep up her enthusiasm for crochet, and at times doubted her ability to get details right. But the thing is, Leaf is a super stylish girl, and at the end of the day she really liked her bag. All of the little missed stitches and frustrations seemed to fade away as she sauntered away from art club with the bag slung over her shoulder.

crochet


Last official day of crochet. We finished two granny squares and whip stitched them together to make a little bag with a single crochet handle. The bags could be lined if we had time and the inclination, but most of the class was just pleased to have finished a crochet project after three weeks of hard work.

Art Club with all their granny squares. We learned how to tie off all the little strings and join squares to make a finished bag.


Sylvia is modeling her crochet hat. Over the past week she has made three hats. She was selling the hats at art club for five dollars a pop, and several of the art club students have future hats on order. Sylvia plans on having an art booth at the neighborhood summer festival in August. I wonder how many hats she can crochet by then? Perhaps some granny square bags as well?

Henry and Isak were also very pleased with themselves. Neither of them have ordered a hat from Sylvia. They want to make their own.


Isaiah and Gillian model bright crochet hats made by Elizabeth (one of our crochet teachers). They both learned how to make single crochet hats in class today, and took thread and hooks home for summer fun.

Friday, May 18, 2007

on the news


Last week Teri Barr (News 3) and a camera crew came to art club and we got on the t.v.! The kids were thrilled, and a little publicity doesn't hurt my own aspirations to get more parents involved in the art club movement.

Tuesday, May 15, 2007

crochet teachers

Dea and Leaf put their heads together on the very first day of crochet.


Brigette analyzing a granny square with Linnea .


Above: Elizabeth working with Gillian on the double crochet stitch.

Below: Sarah helping both Henry and Olive with baby Liza on her lap. Amazing concentration.


At the beginning of the year I asked the kids what they wanted to learn in art club. I taught them to knit last year, and many of them wanted to keep learning finger skills. They asked about crochet. One problem -- I don't know how to crochet. People have tried to teach me over the years, but it's just not something I've ever really embraced. So, needless to say, I was overwhelmed with the idea of teaching ten nine year olds a craft I could not get my own head and fingers to embrace.

I needed to ask for help. First I asked every parent from the art club, and not a one knew how to crochet. Luckily, a new art club has started in the neighborhood run by two parents -- Dea and Brigette (both of whom are granny square masters). We decided to get the two art clubs together this spring and coordinate some crochet lessons taught by them and a few other crochet enthusiasts from the neighborhood. We tried to have one teacher for every two or three young students, so over the past few weeks these teachers have given a great deal of time and effort to the cause. Thank you.

When I talk about wanting new art clubs to start, I am thinking about the opportunities as a teacher to share skills and resources with other parents. I don't think anyone starting an art club has infinite art ideas about what they are going to teach, but the potential for a group of parents working together and sharing inspiration is super exciting. Next fall Dea, Brigette, and I plan on combining art clubs again for a sock monkey session or two (sock monkeys are one of my special skills). I look forward to it.

I keep hoping to hear from other parents who want to start art clubs and share ideas and fun. If you are interested, please email me and I will invite you to a Monday afternoon at the art club. One of our recent crochet teachers, Elizabeth, said that she liked art club so much she is starting one with a friend next year. Hooray.


Monday, May 07, 2007

crochet


I love to watch people do hand work. If you have a grandma who knits then you know what I mean. I have known people who grow instantly more beautiful and interesting with a crochet hook in hand. I love the needleworkers who get so good they can knit and carry on conversations at the same time. I love the way a person's brow will furrow when they miss a stitch or are counting an intricate pattern. Hands always look so potent. Some people stick their tongues out in concentration.

The four photos above were taken at the end of another day of crochet. They were taken in quick succession and I wanted to include them together because they say more than I can about how special it is to observe the art club learning a new finger craft. Watching the kids' faces today as they concentrated and began to flow with the granny stitch was really captivating. Their hands looked more potent and their faces more beautiful than I can remember.

To a one they all agreed that granny squares were easier to learn than the straight double crochet square. Maybe it's just another week of practice, but I feel like we turned a corner. Art Club will spend at least one more week on crochet and see how we feel after next session. We split the group in half today so that each teacher worked with two students at once for an hour and then we switched off. The alternate group was working on a drawing/collage project that was basic and playful in contrast to the brain strain of learning crochet. I think a two student to one teacher ratio is ideal for the initial learning stages of crochet.


Tuesday, May 01, 2007

crochet

We sat outside and the whole crochet lesson was super cozy. Teacher to student ratio for learning a hand craft should be about 3:1. More than that, and kids get frustrated waiting for their questions to be answered.


My true inspiration -- I want to learn how to crochet plastic bags into rag rugs! So nice.


crochet


We started our crochet lessons yesterday. Usually I try and stay one step ahead of the kids, but I don't know how to crochet and so I needed to ask in some guest teachers. Thank you Elizabeth and Dea! I had the opportunity of being one of the art club students, and I think the kids got a kick out of my questions and frustrations. I know how to knit and tat, but somehow crochet makes me feel clumsy and strange. I am always asking the art clubers to try new things, so it only seems fair that every once and a while they get to see me with ten thumbs.

I can't say much about how to teach crochet. We were just working on a ten by ten double crochet square to begin. I was interested in how some students picked it up really quickly and others needed to watch and start over again and again. Also, some kids needed certain language to really get it. For example, once one student heard about "keeping her holding hand in a triangle" she was quite dangerous and adept, whereas before she kept dropping her tension. Another student had to "point their index finger" on their holding hand. That's why it was great to have a couple of teachers because each one had a slightly different way of talking about what they were doing.

We were all very patient. The look of concentration on everyone's face is the true story of the day. Learning a new finger skill takes all your brain power and the art club certainly gave the lesson their best attention for over two hours. It was great to observe the "aha" moment when someone finally got the rhythm and started cruising. Henry was certain he wouldn't like crochet, but then he figured it out and seemed very pleased with himself. He is really satisfied when he problem solves things and crochet is no different than a hard math problem. Henry tied his crochet square around his belt loop and wore it for the rest of the afternoon.

Next week we will take on the granny square.


Tuesday, April 24, 2007

tape sculpture


The real joy of this project was seeing how the kids related to their simple tape objects in creative, playful and unexpected ways. The most basic sculpture was Henry and Sylvia's half orb. It became something to hide in, a giant bowl for pasta, an umbrella, etc. I was enchanted by their whimsy.


Linnea and Carina filled their tape basket (formed over a wooden barrel) with dandelions and violets. They were doing a great deal of skipping.


Carina and Gillian's unicycle turned out to be the least playful object, along with the little taped chair. Neither the chair nor the unicycle could be played with and they just became neutral copies of the real (more potent) objects. The tape bat, ball, and tennis racket were also pretty excellent until somebody tried to hit the tape ball with the real bat and it collapsed on itself. Alas.

tape sculpture


Today we explored the world of tape sculpture. I paired kids up and gave each group a roll of super heavy duty scotch packing tape to work with. I told them to walk around the outside of my house and find an object (or objects if they were small) to make a tape copy from. Tape sculpture is a great way to work large and to explore simple forms. I encouraged looking for simple things and gave them the example of a garden shovel -- mostly because I thought it would be funny to see a shovel made out of tape. Anyway, the various groups chose to copy from a bouncy ball, a unicycle, a bat and ball, a child's chair, and a wooden barrel.

Tape sculpture can also be used in a more decorative way. The tape layers can encapsulate small decorative items like glitter, sequins, ribbons, pebbles or grass. You can make tape shoes, hats, and dresses using your own body as a form. I decided to focus on the large form sculptural aspects of the tape medium, so I didn't give the kids any decorative options.


Tape sculpture is based on a very simple method: use a form; tape around the form with sticky side out; place decorative items on the sticky tape if you are using them; create a second skin of tape with sticky side down; cut the tape form off the original and apply more tape to the cut seams.

Some tips. The more expensive the tape, the stiffer the finished form. Try and pop for the expensive tape if you can when creating larger forms. When you are finished with the second layer of tape do a hand check for stickiness along the outside of the form. If any parts are left sticky in the finished piece they will attract dirt. If you have trouble cutting the form off the original, you might need a straight edge. This medium is very forgiving. Even if the cuts are messy and crude, the final project looks just fine.

Warning. Don't let kids put tape on their lips. We had one student take off a layer of lip skin by being goofy. Kids should tie back their hair. You wouldn't guess this was a dangerous project, but somehow we had a few mishaps.


Wednesday, April 18, 2007

fake fur


Isaiah was intrigued by these pull-string stuffed cars. He altered the cars (note the lime green wheels and orange bodies) and now the mobiles are driven by a "God Bless America" enthusiast and a pink duck with bunny ears.


Carina made these two little critters and salvaged the plastic eyes from other animals. She also made a duck with bunny legs protruding from its stomach (not pictured).


Henry made this dragon from that delightful leopard fur I was coveting in the Anna Chamber's box. The dragon wings are made from some type of stretchy, metallic swimsuit fabric. Henry's dragon has fluffy, yellow bunny ears.


Isak's alterations were very subtle and disturbing. He found two identical blue stuffed bunnies and combined them. He came up with siamese twins. One twin has only one bunny ear and one bunny eye. The other twin is missing an arm. Ouch.

fake fur


When I asked the kids at the beginning of the year what materials they wanted to work with in art club, many answered "fake fur". Fake fur can be expensive, and I didn't have a stash in my basement, so it took me awhile to come up with a plan. Over spring break my family was in New Orleans for Easter and we came back with a garbage bag full of stuffed animals that the kids caught during the three different Easter parades we attended. After picking out a few special stuffed animals, Jimmy and Henry agreed to donate the rest of the animals to the art club as fake fur fodder.


Also, the art club received a generous donation of inspired fake fur and other special tactile delights from our favorite stuffed animal artist, Anna Chambers. Thank you, Anna. A few months ago I emailed Anna about the club and shared photos with her of the art club's felted creatures (directly inspired by her work). She packed up this box of materials for future fun. Check out the pink and red leopard spot fur. What a dream!


I told the kids they could cut apart the stuffed animals for materials and create new objects inspired by the fake fur. Many of them were delighted at the idea of cutting into a stuffed animal (I guess they hadn't been allowed the pleasure previously) and also a little disturbed. One student let out a strange yelp the first time she cut off a bunny ear.


Linnea is a real animal lover. She always wants to draw her pet gerbil or puppy, and dreams about horses. She is extremely gentle in all her dealings with other people and creatures -- by the end of the day she was engaged in pink bunny decapitation.

Tuesday, March 27, 2007

ukrainian easter eggs


ukrainian easter eggs


This is our second year making Ukrainian Easter Eggs. The dyes are vibrant and inspiring to work with even if you don't plan on using traditional wax resist techniques. In Madison I got the dyes, wax, and kistkas (wax funnel drawing tools) at Orange Tree Imports on Monroe Street. One year I ordered supplies online from The Caning Shop and was very happy with their service.


Henry is demonstrating the wax removal technique. The most magical part of Ukranian egg dying is removing the outer wax coating and seeing the vibrant colors preserved underneath.


Annalise is enraptured by her kistka. Using a kistka is really quite hard, especially the cheaper versions that we use. The wax tends to blob and flow in strange and unexplainable ways. I just encourage the kids to choose simple designs and accept the difficulty of drawing with wax. When you look at traditional Ukrainian egg design it is easy to get discouraged by the emphasis on minute details. We are always able to come up with beautiful eggs, but we just try not to focus on perfection.


Linnea's little gerbil egg.

Tuesday, March 20, 2007

chalk drawings


Annalise and Carina combine the early spring enthusiasm of bare feet with hats and polar fleece.


We marked the coming of spring by going outside and creating mandala like chalk drawings on the sidewalk. We were inspired by photographs a friend took in India, and the fact that we had a sunny day above fifty degrees.