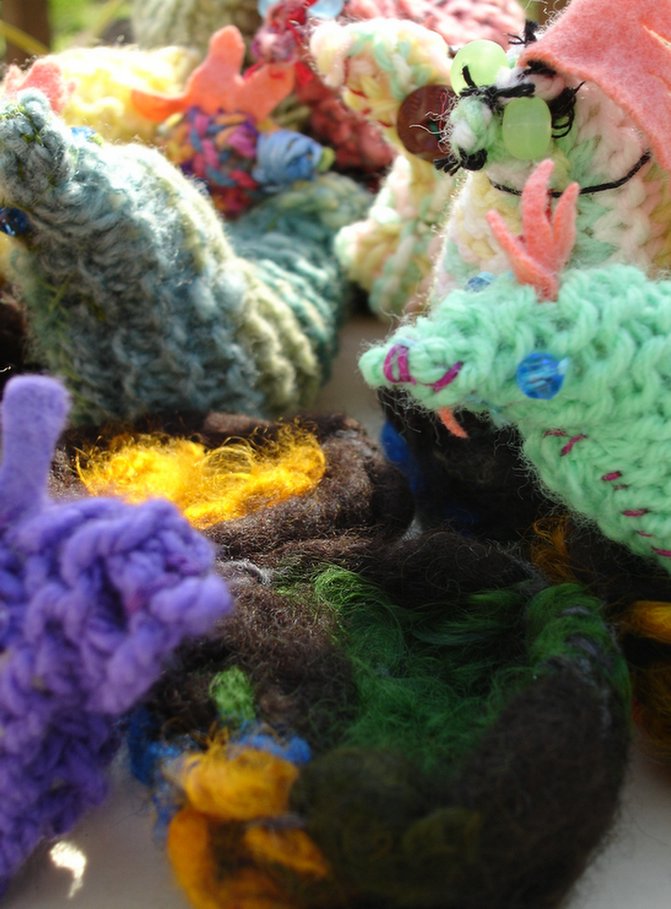
Abby's Art Club

A DIY blog about starting an art club for kids and finding the inspiration to keep it going.

Wednesday, May 31, 2006

chicks and nests

felted nests


A farmer sells wool roving and rainbow colored wool bits at our local farmers market. The art club made felted nests for their knit chickens. Felting with kids is great. They really get into working with wool and warm soapy water. If you can't find an obvious place to purchase raw wool, contact a specialty weaving or knitting store in your area.

I like to felt with kids outside. Use buckets of warm soapy water (I use Joy dish soap) and submerge the wool batting until saturated. The nest batting is made of several layers of wool roving pulled to about four inches -- each layer of wool alternating grain directions. Felting the nests takes about ten to fifteen minutes of rubbing pressure with your hands. You will need a firm surface. I worked on an outdoor table (you can use cookie sheets on the ground or a washboard is great if you have one). Shaping can occur by gently applying pressure with thumbs to create a nest as you felt. Most of the kids came up with fairly flat wool pieces which we later shaped into nests by drying in a bowl position over the top of croquet balls. I also had to give the felted nests a few hand stiches after they were dry to really get them looking tight. The clumps of raw colored wool should be added bit by bit throughout the felting process (adding too much too soon can inhibit the felting of the wool batting). With your fingers detangle the raw wool and seperate the wool fibers before adding them to the nest. After felting has occured run the nests under cold water to get the soap out and finish the felting. The nests will take several days to dry, or you can speed up the process and tighted the felt by putting them in the dryer.

Tuesday, May 30, 2006

tiger's coop

chicken dioramas


We worked on chicken dioramas over several class periods. I showed the class a traditional Day of the Dead skeleton tableau for inspiration. First we shaped the sculpy chickens in bright colors. After the chicks were baked the kids practiced their detailed painting skills (we looked at painted Oaxacan wood animal figures for ideas). Olive's dad precut the wood diorama walls and the kids painted them solid colors the following week. The walls were glued together outside of class using wood glue. Popsicle stick fences, glitter, painted windows and doors, fake grass, miniature baskets, sculpy eggs, wood dowel roosts, and the chickens themselves were added on the final day of the project. We used hot glue for all the fixins.

Friday, May 26, 2006

leaf's chiken painting

block paintings


I painted scrap wood in bright colors with enamel paint so that when the art club arived they had bright, glossy blocks in different sizes to work with for their chicken paintings. First we took time to look at chicken illustrations in books and magazines for inspiration. Then we spent about a half hour drawing chickens on paper. We picked our favorite designs for painting on the blocks. Some of the kids worked better when they had a pencil cartoon to start with, while others wanted to work directly with the paint right away. I encouraged some of the students to go back into their paintings with sharpie markers after the paint was dry because many of them had a hard time getting linear definition with a paint brush. They came up with some wonderful paintings. I was interested in the paintings as a group because they had a relationship in terms of method, but each artist really brought their own sensibility to the project.

Thursday, May 25, 2006

art box


Most of the supplies for art club I keep in my basement and bring up as needed, but Olive has a special art box she brings along sometimes. The art box used to be her mother's. In it she collects all her important art materials -- pens, brushes, charcoal, pencils, colored pencils, scissors, sharpeners, a ruler, paint, fountain ink, clay, a sewing kit, a Japanese writing box, and a jack knife (for sharpening fat things). There is a seperate paper compartment. She keeps a postcard of Ukranian egg decoration and a paper umbrella in the box for artistic inspiration.

I was quite inspired by Olive's art box and felt the world would be a great deal better if we all kept something of the sort.

Wednesday, May 24, 2006

Olive's doll


Olive's mom is a sewing prodigy. She made the doll on the left when she was twelve years old. Olive brought the doll to share with the class. Olive's doll is on the right. She brought her doll home this week so she could make some doll clothes with her mom.

Tuesday, May 23, 2006

doll making


We started making self portrait rag dolls at art club yesterday. Artist Heidi Ganshaw and neighbor Joy Wagner (not pictured) joined in the fun. We needed extra adult hands to help kids thread needles, cut patterns, and manage the sewing machine.

I had various examples of rag dolls available for inspiration -- everything from Raggedy Ann to sock monkeys. I asked the kids to pick a style of doll body, create and cut a pattern, and find a way to represent themselves in doll form. The kids looked for yarn to match their own hair color and buttons to match their eyes. Most of the dolls still need clothes, so there will be more progress made next week in the fashion department.

Monday, May 22, 2006

fancy shirt


This weekend Sylvia made a fancy new shirt. She is shown here modeling her finished creation. The front panel is vintage holly hobby, and the side panels are salvaged four way stretch. The back laces up corset style with a simple shoestring. The text on the front reads, "Everyone needs a good friend."

Friday, May 19, 2006

hot pads

Sylvia's hot pad


I found some hot pads thrifting and had the art club create fabric applique chickens for the sale. These were very popular items because they are useful and artistic. It is important to have many fabric scraps for art club materials. I let the kids pick through different fabrics in the retro kitchen stash. From these bits and pieces they collaged the chicken designs on the hot pads. We backed each fabric piece with iron-on transfer paper. I did the ironing. Next we used the machine to secure the applique. Some of the kids already knew how to use the sewing machine (but if not this is a hard project to learn machine sewing with because of the thickness of the hot pad). I thought the rick rack legs were an excellent idea.

Thursday, May 18, 2006

art bikes


Spring is the time of year to trick out kids bikes in an artful way. We used zip ties to decorate Jimmy's trike with plastic creatures. We have also used hot glue when permanence was not an issue. Madison has an annual art bike parade in which to show off your creations. The local St. Vincent de Paul was able to donate bikes to the art club for total transformation and fun.

Wednesday, May 17, 2006

Henry's giraffe with googly eyes


I love this picture so much.
Henry made the mama and baby giraffes.

Tuesday, May 16, 2006

googly eyes


Today we created animals from googly eyes, pipe cleaners, and puff balls. These are some pretty excellent art materials. It's hard to go wrong, but I was amazed at the different approaches each student took. All the creatures were individualized and particular.

the kitchen table


I have a big table in my kitchen where the art club meets. I can fit up to eight kids around my table at a time. Some projects can be done on the floor or outside (weather permitting), but if you are thinking about starting an art club in your home, invite as many kids to join as can fit at your table. I think that an art club with three or four kids is just as good as one with more. In fact, some projects are best with more individual attention. I invited eight kids to join because I have the space and it seemed like there was a lot of interest. I have had other students and parents ask me if I had room for one more person, but I have tried to keep it the right size for our workspace. There is nothing worse than trying to make art without enough elbow room.

Monday, May 15, 2006

knit chickens


The art club learned to knit this year and for many of the students these chickens were their first ever completed knitting project. The time commitment, sincerity, and cuteness of the knit chickens made them one of the most poular items in the art sale. I actually asked the kids when they were finished if they really wanted to sell them and they all said yes (so their parents had to buy them back at the sale if they wanted to keep their kids first knitting projects -- 8 dollars a piece).

At the beginning of December we started learning to knit and I told the kids to get enough yarn for a scarf, but I soon realized that a scarf takes too much time. The chickens are a 16 by 16 square folded in half and stuffed and tucked to create the neck and back (with a felt comb and some embroidered eyes). Keeping to a strict square helped the students to concentrate on counting each row for dropped or added stitches, which seemed to be the biggest problem.

Attention span for beginning knitting projects with kids is really important, and being able to finish and individualize a knit chicken in a few sessions helped the students stick with me and overcome the frustrations of hand coordination and tension problems. I know that some of the art students went on to complete knit scarves over the winter season outside of art club. I hope that some of them will keep at it and develop a lifetime hobby. Next year I plan to revisit knitting and maybe we will learn to crochet as well.

Saturday, May 13, 2006

the art club


Here is a picture of the art club on a day we played with face paint.

Top row Monona, Isaiah, Linnea
Middle row Sylvia, Henry, Isak, Tiger, Olive, Leaf
Bottom row Jimmy, Frida

Friday, May 12, 2006

the art teacher


My name is Abby and I am an artist and mother of two, Henry age 8 and Jimmy age 4. Here is a link to my published fame. I have been making art with the same group of kids for the past three years. They are all classmates of my son Henry. I started the art club because I wanted to spend time with Henry's friends and because it seemed like there was a need for more art time outside of school. I have taken sporadic photos of various art projects in the past. I hope that starting a blog will help me share these moments and take more faithful documentation in the future.

Thursday, May 11, 2006

chickens for chickens


I'm starting this weblog to share pictures and projects from the art club that meets at my house every monday after school. There are eight third-graders in the club, including my son Henry. Last Friday we had our first show -- "Chickens for Chickens". The kids sold their artwork as a fund raiser for Heifer International. All of the art was chicken-themed, and they raised about $840 -- enough to buy 42 flocks of chicks for families in need.